1 Basic mapping in Radiant
2 ========================
7 This section will introduce the Radiant interface. Before you begin mapping, one must become acquainted with the basic user interface first. Radiant has five main sections by default, as numbered in the screenshot below. Let’s examine these panels a bit more in depth:
9 [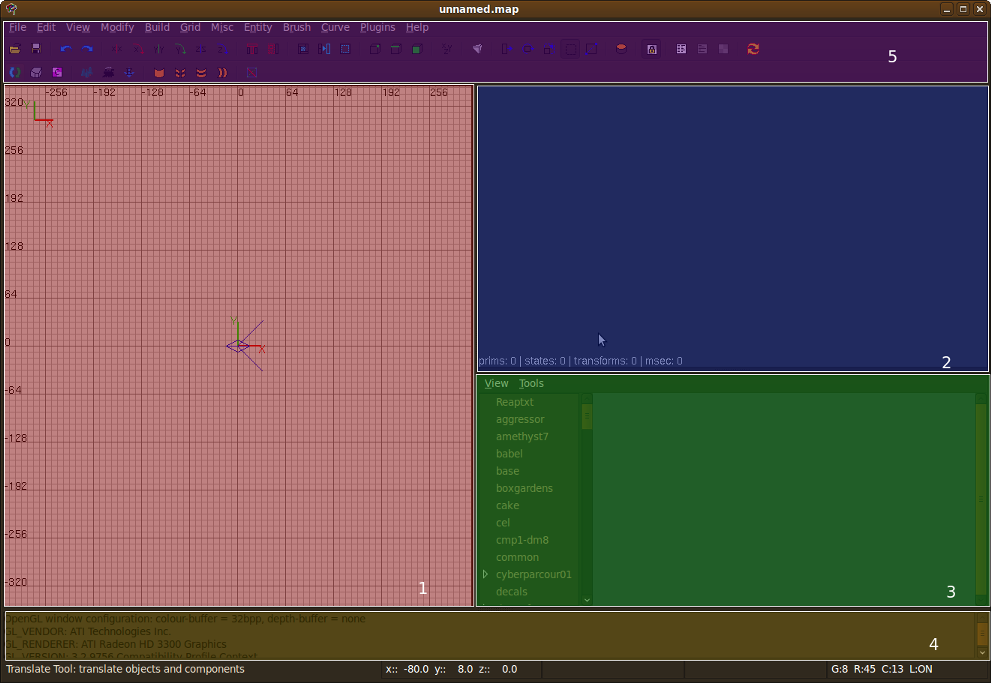](https://gitlab.com/xonotic/xonotic/wikis/assets/images/radiant_sections.png)
14 ### *Fig. 1* - 2D View
16 This area allows you to view the map straight on from a certain axis, similar to what you may find in a CAD program. This is useful for aligning things flush with walls or other surfaces and for finer movement/scaling control. Numbers on the top and left edges mark distances on the grid, to help in the placement and measurement of objects or in the creation of symmetric structures.
18 ### *Fig. 2* - 3D View
20 Provides a basic 3D render of how your finished map will look. It does not render lighting or special effects, but it does render the textures and geometry as you will see them in-game. Some vital information (e.g. primitive count, transformations, etc.) are displayed in the bottom left-hand corner of the viewport.
22 ### *Fig. 3* - Texture View
24 Lets you browse and manage your map’s texture sets. Scroll through the list on left-hand panel and select a texture set to see thumbnails of its contents in the open space to the right.
26 ### *Fig. 4* - Console
28 This is a short, moderated version of the console output of Radiant’s console output. It displays the status of the map’s build progress and various OpenGL information. Generally, the output from your native system’s console may be much more complete and verbose than the in-editor one, particularly during compile time.
32 The standard toolbar. Contains all of the necessary tools and actions that you can use on your map, such as opening and saving existing maps, selecting meshes, rotating objects, flipping objects on an axis, etc. To see what an icon means, hover your cursor over the item and the tool’s name and a brief description should appear on the bottom left-hand corner of the window in the status bar.