Preface
=======
-This tutorial aims at showing all fundamental aspects of vanilla gameplay to enable new players to pick up the ropes quickly. It includes the information of all six blog posts of the [Newbie Corner](http://xonotic.org/tag/newbie) as well as some new things that have changed or that I didn’t think about back then.
+This tutorial aims at showing all fundamental aspects of vanilla gameplay to enable new players to pick up the ropes quickly. It includes the information of all six blog posts of the [Newbie Corner](http://xonotic.org/posts/2014/halogenes-newbie-corner-comprehensive-tutorial/) as well as some new things that have changed or that I didn’t think about back then.
Note that all this applies to vanilla Xonotic. Whereas movement aspects should usually apply more or less unchanged to modified servers offering minstagib, vehicle ctf or overkill gameplay, I will not explain the specifics of these game modifications/mutators - I simply lack the expertise in non-vanilla game modes. So if you want to fully apply the knowledge gained from this tutorial, search for vanilla servers (Xonotic icon next to it in server browser) or use the official [HUB] ones.
Blaster Jumping
-------------
-[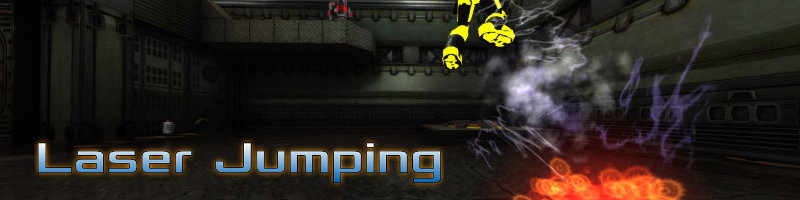](http://www.xonotic.org/m/uploads/2014/04/lj1.png)
+[](http://de.git.xonotic.org/?p=xonotic/xonotic.wiki.git;a=blob_plain;f=assets/images/blaster-jumping.png;h=03aae64bfd8c93c878283346b73509b9784d9d55;hb=HEAD)
Let’s now have a look at two important aspects of a very useful movement tool in Xonotic, the blaster! While dealing somewhat low damage, the blaster is one of the most important weapons in Xonotic. It’s projectile creates a blast upon impact on any surface or object that deals little damage to players being nearby, but pushes such players away from the impact spot. That way, the push force of the blaster projectile impact can be used to move both other players and yourself around. You can test this easily by standing and shooting at the ground below you with the blaster. You’ll notice that you get pushed up into the air by the blast. Now if you jump at the same time, you can get pushed even higher. If you get the timing right, you can get very high, like from the upper platform to the roof or from the fan to crylink on the map Xoylent.
Wall Blastering
-------------
-[](http://www.xonotic.org/m/uploads/2014/04/wall-lasering.png)
+[](http://de.git.xonotic.org/?p=xonotic/xonotic.wiki.git;a=blob_plain;f=assets/images/wall-blastering.png;h=ee7399f540008cc55e47b787b1731dafd01c1379;hb=HEAD)
Now, when accelerating fast, you won’t always want to do that vertically. Some times the first few bunny hops are not fast enough to reach a place (or to get out of a place) in time. With the technique of wall blastering you can easily reach rather high horizontal speeds instantly, out of the stand.
### Xoylent
-- The ramp I showed as first example on Xoylent can also be used to get to the nex platform. It’s easier if you use the right corner of the ramp for this jump.
- [](http://www.xonotic.org/m/uploads/2014/04/xoylent-ramp-1.png)
+- The ramp I showed as first example on Xoylent can also be used to get to the vortex platform. It’s easier if you use the right corner of the ramp for this jump.
+ [](http://www.xonotic.org/m/uploads/2014/04/xoylent-ramp-1.png)
*click to view full size*
- At mega health you can do a double ramp jump up to crylink, the pipes serve as second ramp. Note that you don’t have to approach these ramps frontally as you can compensate the lower upwards boost by using the second ramp.
[](http://www.xonotic.org/m/uploads/2014/04/xoylent-ramp-2.png)
*click to view full size*
-- One of the most tricky ramp jumps I’m going to show you here is the one from rocket launcher to mega health. Unless you do a [circle jump](http://www.xonotic.org/2013/02/a-strafe-jumping-lesson-from-hero), this one is not possible to my knowledge to do with walking speed, so you’ll have to do a bunny hop onto the ramp. I always start between the devastator’s spawn point and the wall behind it, start a bunny hop and usually hit the ramp at the right time then. You’ll have to experiment a bit and find the good starting point for you, then you can reproduce that jump and start to get a feeling how you can do it in-game on the fly, without stopping at your favorite starting point. When turning around after the ramp jump you can switch from the forward key to the appropriate strafe key in order to lose less speed, but it’s not required to perform that jump.
+- One of the most tricky ramp jumps I’m going to show you here is the one from devastator to mega health. Unless you do a [circle jump](http://www.xonotic.org/2013/02/a-strafe-jumping-lesson-from-hero), this one is not possible to my knowledge to do with walking speed, so you’ll have to do a bunny hop onto the ramp. I always start between the devastator’s spawn point and the wall behind it, start a bunny hop and usually hit the ramp at the right time then. You’ll have to experiment a bit and find the good starting point for you, then you can reproduce that jump and start to get a feeling how you can do it in-game on the fly, without stopping at your favorite starting point. When turning around after the ramp jump you can switch from the forward key to the appropriate strafe key in order to lose less speed, but it’s not required to perform that jump.
[](http://www.xonotic.org/m/uploads/2014/04/xoylent-ramp-3-thumb.png)
*click to view full size*
[](http://www.xonotic.org/m/uploads/2014/04/afterslime-electro.png)
*click to view full size*
-- The very same jump can be done from electro gangway up to the upper passageway near strength room. Using this jump enables you to avoid making suspicious noises by using the jump pad or the laser.
+- The very same jump can be done from electro gangway up to the upper passageway near strength room. Using this jump enables you to avoid making suspicious noises by using the jump pad or the blaster.
[](http://www.xonotic.org/m/uploads/2014/04/afterslime-electro.png)
*click to view full size*
[](http://www.xonotic.org/m/uploads/2012/11/runningman-hagar-double.final_.png)
*click to view full size*
-- This jump up to mortar works most reliably for me when I walk up to the ramp and jump just before I touch it. It’s the easiest way to get get up there without having to traverse the very open space or making a laser jump (which makes noise).
+- This jump up to mortar works most reliably for me when I walk up to the ramp and jump just before I touch it. It’s the easiest way to get get up there without having to traverse the very open space or making a blaster jump (which makes noise).
[](http://www.xonotic.org/m/uploads/2012/11/runningman-mortar.final_.png)
*click to view full size*
*click to view full size*
- From the vortex you can use these little lamps to get to the 50 health on the pipe.
- [](http://www.xonotic.org/m/uploads/2014/04/glowplant-nex.png)
+ [](http://www.xonotic.org/m/uploads/2014/04/glowplant-nex.png)
*click to view full size*
- From bottom level outside you can get to the devastator using the broken pillar.
- [](http://www.xonotic.org/m/uploads/2014/04/glowplant-rocket.png)
+ [](http://www.xonotic.org/m/uploads/2014/04/glowplant-rocket.png)
*click to view full size*
-- This is a very nice ramp jump that’s essentially a double ramp jump with a follow-up ramp jump on the small pipe. You’ll usually land on the flat level of the pipe before hitting the pipe ramp, so it doesn’t really count as a triple ramp jump but still it is very useful in order to get to the rocket launcher platform without using the slow vent shaft.
- [](http://www.xonotic.org/m/uploads/2014/04/glowplant-crates.png)
+- This is a very nice ramp jump that’s essentially a double ramp jump with a follow-up ramp jump on the small pipe. You’ll usually land on the flat level of the pipe before hitting the pipe ramp, so it doesn’t really count as a triple ramp jump but still it is very useful in order to get to the devastator platform without using the slow vent shaft.
+ [](http://www.xonotic.org/m/uploads/2014/04/glowplant-crates.png)
*click to view full size*
-- Those handy little lamps everywhere… here you can use one to get to the nex level from rocket launcher.
- [](http://www.xonotic.org/m/uploads/2014/04/glowplant-upper-level.png)
+- Those handy little lamps everywhere… here you can use one to get to the vortex level from devastator.
+ [](http://www.xonotic.org/m/uploads/2014/04/glowplant-upper-level.png)
*click to view full size*
These are just a few examples where to find ramps on Xonotic maps and how to use them. Keep your eyes open for ramps and interesting jumps to do with them, as most mappers put some ramps at strategic places. Ramp jumping is a lot of fun and mastering this technique can give you a real advantage over other players!
[](http://de.git.xonotic.org/?p=xonotic/xonotic.wiki.git;a=blob_plain;f=assets/images/Vortex.png;h=d79f4796453c1cb4fe52c043e56614e9c5528631;hb=HEAD)
-In the hands of a player with a good aim the vortex is probably the most powerful weapon in the entire game. It fires a single beam with zero spread that will instantly hit anything in its way and will even shoot through other players. You’ll notice a small ring around the crosshair when holding the vortex in your hands. If the ring is full, the vortex is charged (and also starts to glow red). Charging happens automatically once you hold the weapon, and it does not cost any ammo. Upon firing, the vortex obviously discharges and starts to recharge unless you switch to another weapon (what you should do, but more about weapon combos [later](Halogenes_Newbie_Corner#weapon-comboing)). If charged, the vortex deals 80 dmg, if you shoot with it immediately again, it deals 64 dmg, minimum damage you can deal with nex is 59 (if you switch to another weapon immediately after shooting and then shoot nex immediately after reswitching to vortex, so it doesn’t have the refire time for recharging).
+In the hands of a player with a good aim the vortex is probably the most powerful weapon in the entire game. It fires a single beam with zero spread that will instantly hit anything in its way and will even shoot through other players. You’ll notice a small ring around the crosshair when holding the vortex in your hands. If the ring is full, the vortex is charged (and also starts to glow red). Charging happens automatically once you hold the weapon, and it does not cost any ammo. Upon firing, the vortex obviously discharges and starts to recharge unless you switch to another weapon (what you should do, but more about weapon combos [later](Halogenes_Newbie_Corner#weapon-comboing)). If charged, the vortex deals 80 dmg, if you shoot with it immediately again, it deals 64 dmg, minimum damage you can deal with vortex is 59 (if you switch to another weapon immediately after shooting and then shoot vortex immediately after reswitching to vortex, so it doesn’t have the refire time for recharging).
Secondary fire only zooms in, as the weapon is strong enough as it is even without a secondary fire mode.
The devastator also has some very interesting features that are not very typical for this kind of weapon. First of all you can use the secondary fire to immediately detonate remotely any rocket you fired (provided of course it is still flying). No need to hit a flying target directly, just get the rocket near and, BAM, there you go. Apart from the high splash damage, the explosion also deals quite a lot of push force, so if you want to push some flying player off the map, devastator is your weapon of choice as you can not only push players away from you (push direction obviously depends on the explosion’s position in relation to the player).
-But not enough, you can of course also use the devastator to push **yourself** around. If you happen to be flying and need some extra acceleration but there is no wall near to laser yourself off, just shoot a rocket downwards and immediately detonate it. Yes, it hurts. A lot. But it might be worth it, be it to push you back onto the map if you are falling into the void or to prolong a laser jump so you manage to reach a distant location. This technique is called “rocket flying”.
+But not enough, you can of course also use the devastator to push **yourself** around. If you happen to be flying and need some extra acceleration but there is no wall near to blaster yourself off, just shoot a rocket downwards and immediately detonate it. Yes, it hurts. A lot. But it might be worth it, be it to push you back onto the map if you are falling into the void or to prolong a blaster jump so you manage to reach a distant location. This technique is called “rocket flying”.
You think I’m already done with the devastator? Not yet! In addition to this already very useful feature to remotely detonate your rockets you can also **guide** the rockets. Just keeping the primary fire button pressed and moving the mouse enables you to do some [interesting stuff](http://www.youtube.com/watch?v=UqfqWtXwjic) which can come in very handy in all sorts of situations.
crosshair_dot_color 0.24 1 0.13 (this too is all about personal preference)
crosshair_per_weapon 0
crosshair_color_per_weapon 1 (if you like to know the weapon per crosshair color)
- crosshair_ring 0 (this removes the nex ring, keep it if you like to see it)
+ crosshair_ring 0 (this removes the vortex ring, keep it if you like to see it)
crosshair_ring_reload 1 (mg reload ring might be useful)
crosshair_ring_reload_size 1 (adjust to your liking, default is too big imho)
crosshair_size 0.28 (adjust to your liking)